Waterproofing Training Courses Update Your Skill Set Register Now
Choosing the Right Waterproofing Products for the Job Learn More
INTRODUCTION
This is a general guide to waterproofing basements/retaining walls. Always refer to the manufacturer’s technical data sheet for specific instructions.
SUBSTRATE PREPARATION
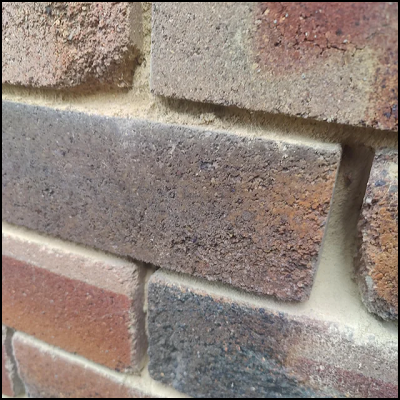
Brick/blockwork walls should be inspected for voids and/or missing mortar. Repointing or bagging the area with a sand cement mix is generally recommended, Gripset 11Y is an ideal additive for increasing the overall strength of your sand cement mix. Large voids or cavities can be filled with Mapegrout Rapido or an equivalent shrink-compensated repair mortar. You are looking to achieve a reasonably flush substrate; this will also make the application of your membrane much easier.
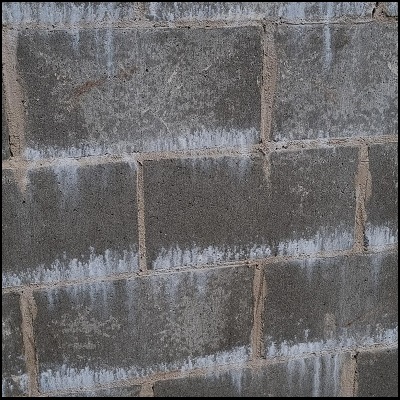
CLEANING
Cleaning the area is a crucial step in any waterproofing application. Surfaces need to be free of dust and laitance, surface contaminants can jeopardise your membrane’s bond strength, and in some cases, it could lead to the membrane delaminating. Cleaning is best achieved by means of brooming and vacuuming the area. If efflorescence is present (appears as white salt-like deposits on the surface) you will need to apply Efflorescence rid. If the area is excessively dirty, a high-pressure wash may be required, the substrate should then be allowed to dry to an acceptable level.
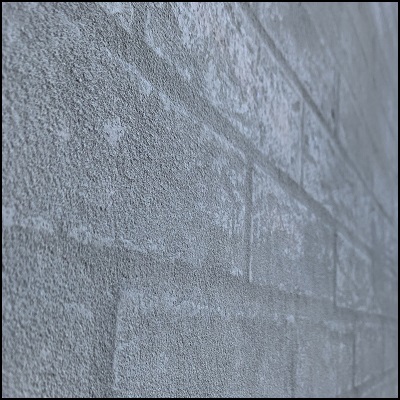
PRIMING
Although each step of this process is equally important, failure to prime correctly is still one of the number one reasons why failures occur, thus its importance cannot be understated. Determining if your substrate is porous or non-porous is the first step in understanding which primer should be used, other factors include how damp the substrate is and the upcoming weather conditions. Manufacturers’ technical data sheets will inform you which primer should be used given the circumstances.
Most primers are applied via brush or roller in a single coat, the primer should be applied to all areas that will be waterproofed. Some products like Maxseal Flex only require you to dampen the substrate with water, while Gripset 51 simply needs to be diluted with water to act as a primer. These variations in priming help illustrate the importance of referring to the manufacturer’s data sheets.
You can also read our non-porous substrate priming blog, it contains more in-depth information on non-porous and epoxy priming.
DETAILING
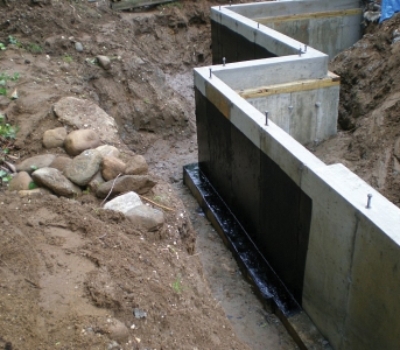
In some cases like Concrete Waterproofing, you may have penetrations like PVC pipes and conduits that require detailing before the membrane application. These areas can be subject to movement/vibrations, so rather than a non-shrink grout, a high-quality, flexible caulking compound like FulaFlex 625 should be used. Apply a generous bead of caulking around the entire perimeter of the penetration, making sure it is completely sealed. Alternatively, Gripset has a range of flexible premade collars that can be applied and painted in with the membrane application. You will also need to apply a bead of caulking where the wall meets the concrete footing to seal that joint before waterproofing, specialized flexible tapes like Hyperband can also be used to detail this area.
MEMBRANE APPLICATION
Before applying any waterproofing membrane, you should double-check the upcoming weather conditions, generally you should allow for around 48 hours of clear weather. It’s worth noting that observing the weather conditions should also take place before any stage of this process has commenced.
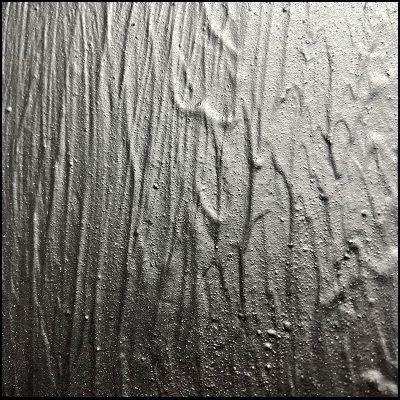
Liquid-applied membranes such as Sikalastic 777 or Gripset 51 are easily applied via brush and roller. Start with a brush and focus on the areas that required detailing in the previous step. Apply a thick coat of waterproofing around any penetrations and at the footing to wall junction, if you are using a flexible tape and/or collars, applying your membrane with a brush will “paint” these products onto the substrate so that they adhere. At this point, it’s easiest to swap to a roller and apply a thick coat of membrane over all areas that require waterproofing, try and apply the membrane in a uniform direction (either vertical or horizontal, but stay consistent with one direction)
Hint : Obvious thick waves and valleys left by the roller are a good indication that you are applying the membrane correctly. The membrane should not appear smooth or flat on the substrate.

Allow the first coat sufficient time to dry, this information can be located on the manufacturer’s datasheet. Keep in mind that the drying times are often based on 23 degrees with 50% relative humidity, colder conditions will drastically increase the time it takes for a membrane to dry, warmer conditions will do the opposite. Always air on the side of caution, if you are not sure that the membrane has dried then allow more time.
Your second coat of membrane should be applied in the opposite direction to your first coat, this will both help the membrane integrate with the previous coat and fill any “valleys” left by the roller on the first coat. When applying the second coat you may need to switch back to a brush for the areas that required detailing.
Although many waterproofing membranes are applied via brush and roller it is important to not apply them the same way you would regular house paint. Waterproof membranes are applied around ten times thicker (per coat) than common paint. The manufacturer’s data sheet will advise you of the thickness you need to achieve, typically it’s in excess of 1mm. Often it is suggested you can achieve the required thickness in two coats, but this isn’t always the case, provided each coat is sufficiently dry you can apply further coats until you have reached the desired thickness. This is often referred to as dry film thickness within the manufacturer’s data sheets.
PROTECTION
Allow the membrane time to reach its full cure, again this information can be located on the manufacturer’s datasheet. Many liquid-applied membranes cure by releasing their moisture content into the surrounding atmosphere, they need to be able to “breathe” You should not be placing anything directly against the membrane at this stage, this will prohibit the moisture from escaping and lead to condensation, further leading to a semi-permanent uncured membrane.
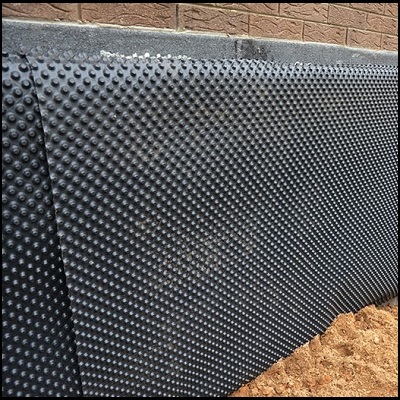
Once the membrane has completely cured, sheets of corflute or protection sheet need to be used to protect the membrane from damage that could occur during the backfilling process. Typically, these products are not fixed to the membrane and rely on the weight of the backfilling to keep them in place. Slight overlaps on the corflute sheets can be sealed together with duct tape.
Hint : Stronger protection products like protection sheet can also be beneficial as a root barrier when trees and plant life close to the area mature and spread roots.
Ash Perks
Copyright © 2023 The Waterstop Shop, All rights reserved.


